If you’re a YouTube content creator, you’ve probably heard of “Advanced Features” for YouTube channel verification. But what are these, and what do they do? Advanced Features is a group of settings allowing you to manage your YouTube channel with more features better and simplify your workflow. They can improve your channel’s viewing experience, help manage your videos, and give you more control over ad revenue. One of the essential features that is activated after verifying Advanced Features on newly established channels is the post community tab. Until a few years ago, the community tab was activated if a channel reached 500 subscribers. But now, everything has changed. According to the image below, if you have a newly established channel and want to open and use the community tab very soon, you must activate the channel’s Advanced Features. Another feature is putting external links in video descriptions.

Advanced Features are usually automatically activated with your activity history in the channel after about one to two months. But in this article, we will teach you how to start the Advanced Features channel yourself from the first day of establishment. Stay with me and follow all the steps carefully.
The first step is to verify the YouTube channel.
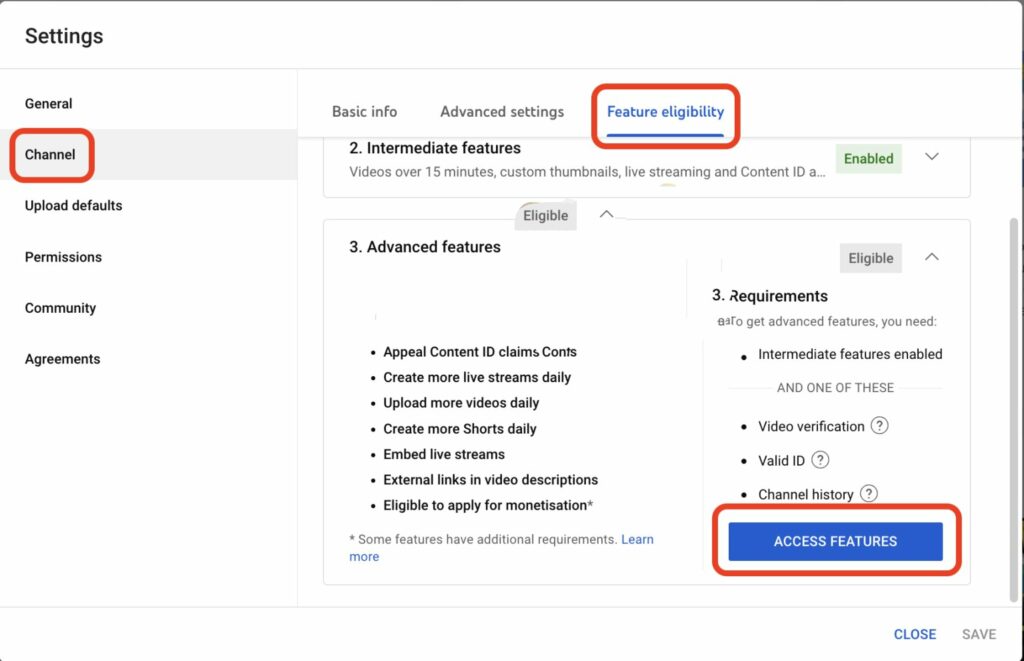
1• Enter YouTube Studio. Click on the settings option from the left menu and enter Settings. Then go to the Channel section and the third tab, Feature Eligibility. You must verify the second option with a phone number to access the third option. Open Advanced Features and select the ACCESS FEATURES option:
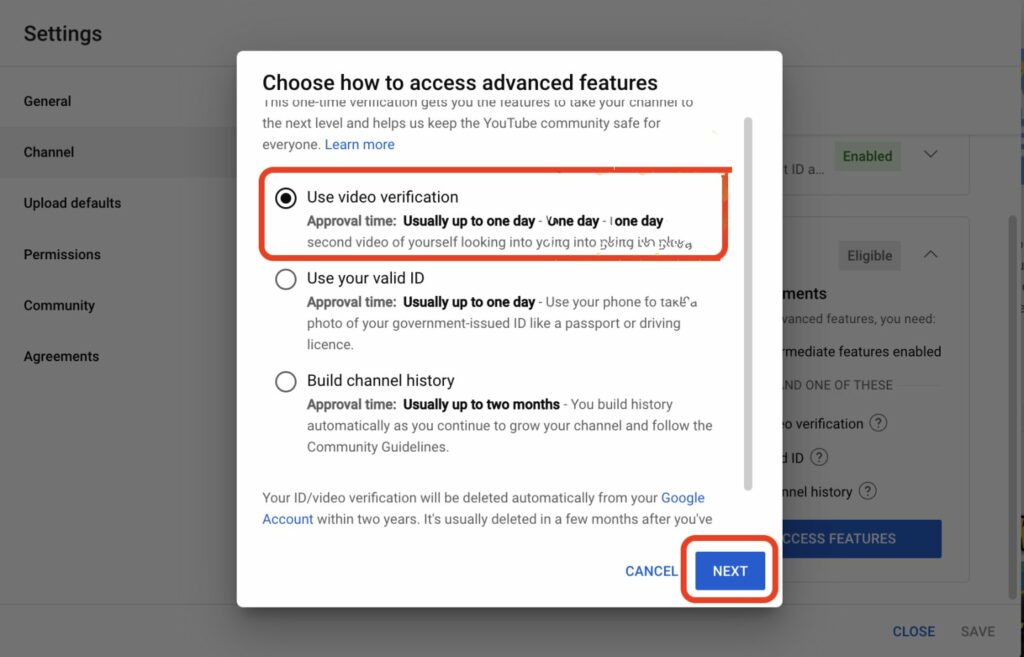
2• You are faced with three options. In this article, we will teach you how to verify the YouTube channel with the first option, with a 30-second video of the face. Choose the first option and click Next:
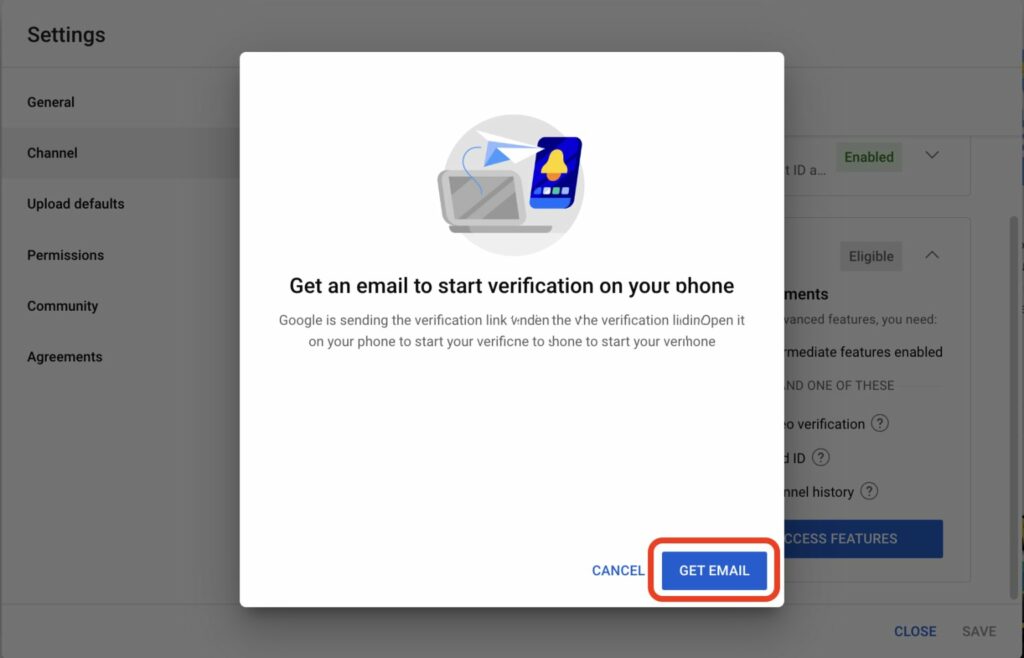
3• In this step, click on GET EMAIL to send an email to the Gmail account you created the channel with:
4. Note that you must have signed in the desired Gmail (with which you created the channel) on your mobile phone. Click on Done and continue this process on your phone.

The second step is to verify the YouTube channel.
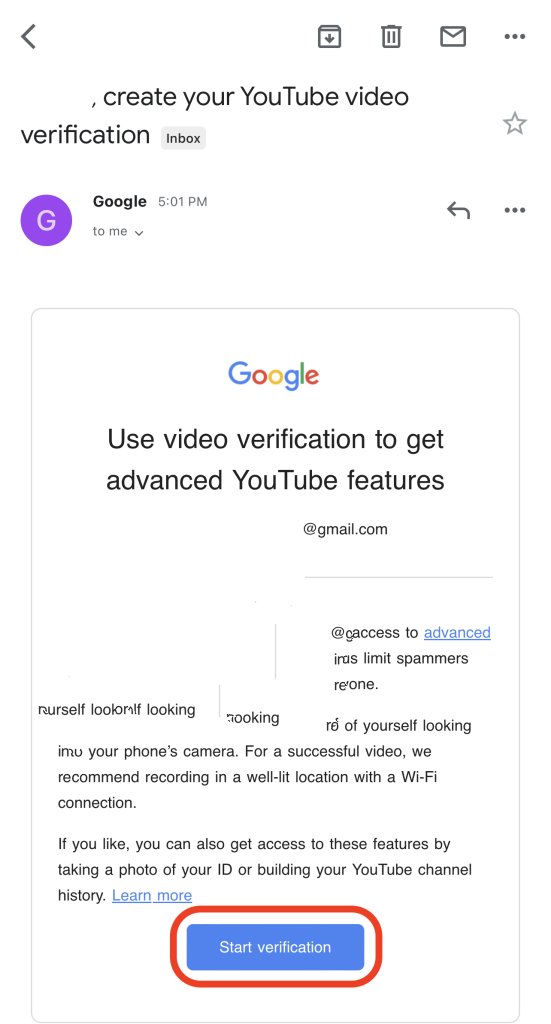
5. An email like the one below has been sent to you. Open it through the Gmail app on your phone and click on the Start Verification option:
Tip: If your phone’s operating system is iOS, open it with Safari, but if it is Android, open it with Chrome!
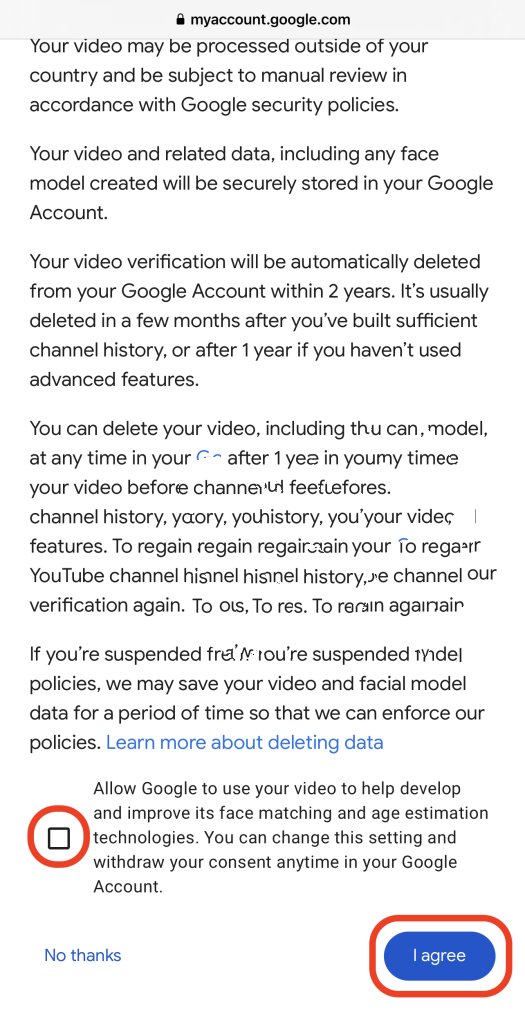
6• In this step, scroll to the bottom of the page. Tick the Allow option and select I agree.
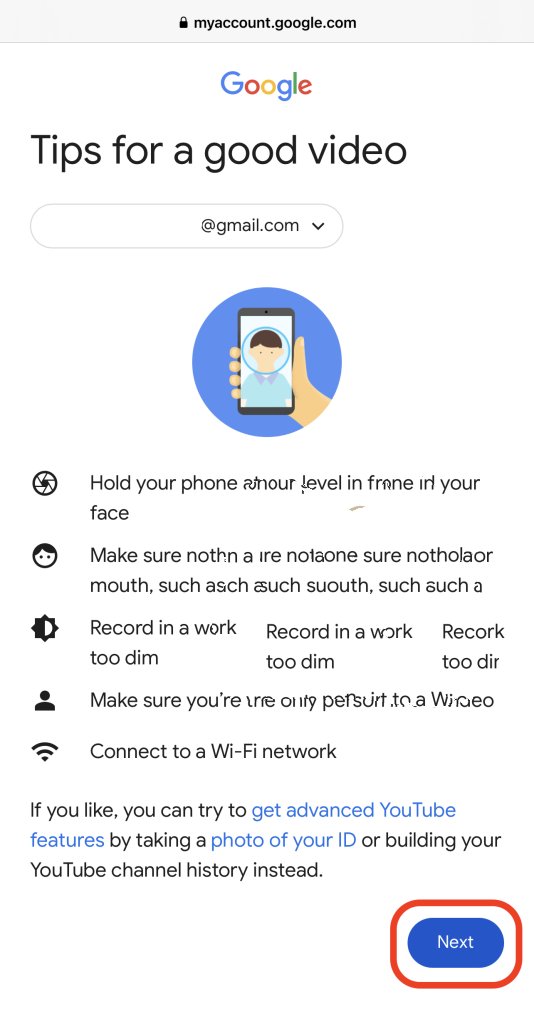
7• At this stage, you will be informed about the suitable conditions for taking a video of the face. Be sure to send the video under the mentioned conditions so that Google accepts the desired video:
Tips for a good video for YouTube channel verification:
- Tips for a good video for YouTube channel verification:
- Hold your phone at eye level and right in front of your face. (Don’t stand far from the camera)
- Make sure nothing like glasses, sunglasses, or hats and your hair covers your eyes, nose, or mouth. (No obstacle should be on the roundness of your face and eyes.) – If you are a woman, you should be without hijab and obstacles.
- Be sure to be in a place with a lot of good light that is not too bright and not too dim. (brightness is significant)
- Make sure you are the only person in the video.
- Be sure to connect to a Wi-Fi network.
Click Next.
8• Select the Allow option to enable access to your phone’s camera.
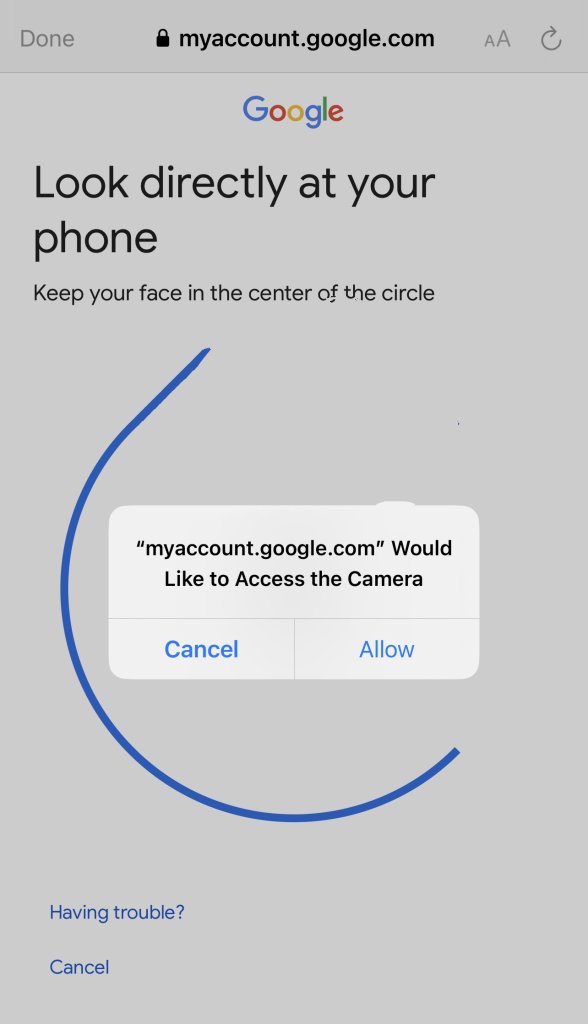
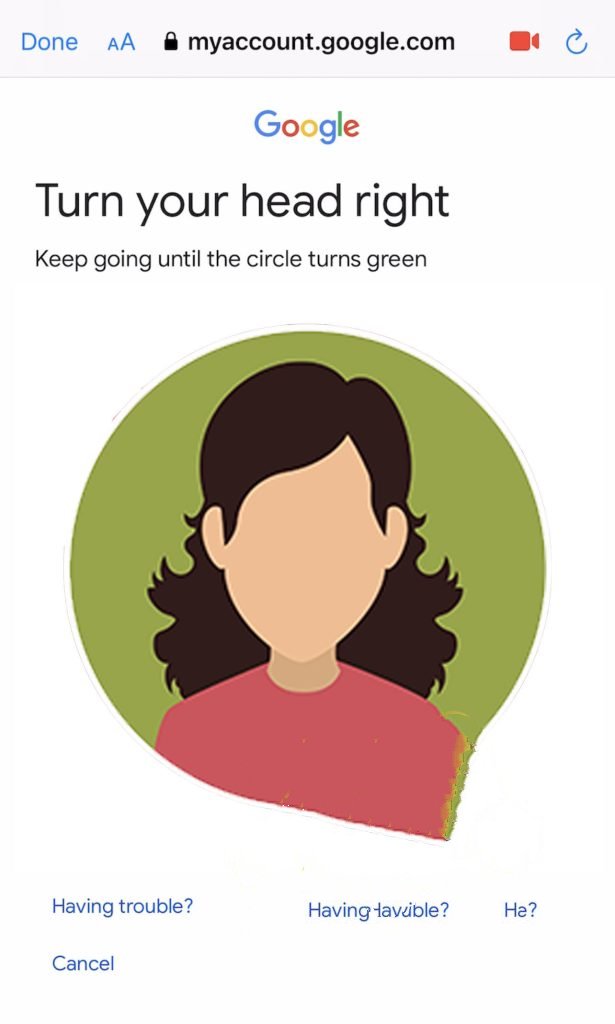
9. Comply with the necessary conditions that are given to you. Allow a 30-second video of your face to be captured by turning your head in any desired direction.
10• Wait a short time, do not turn off your mobile screen, and do not close the Gmail application until the video is uploaded.
11• Your video has been reviewed. Be patient and verify the YouTube channel within 24 hours or less, and a confirmation email will be sent to you.
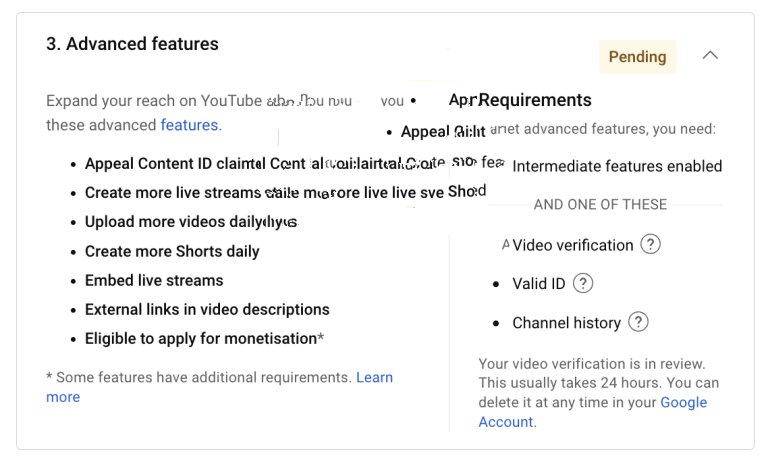
12• Now, if you go to your channel settings, you will see that the third option for advanced features is pending.
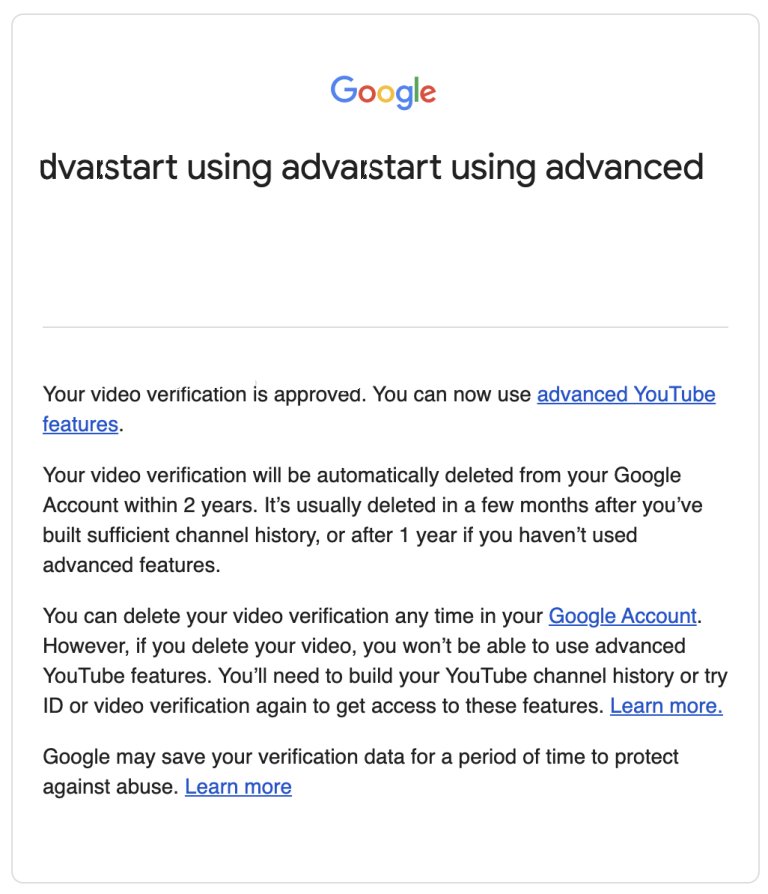
13• Hours later, if your video is accepted, you will receive the following email, and when you go to the channel settings section, you will see that the third option of advanced features is enabled. So, the community tab of the post will open:
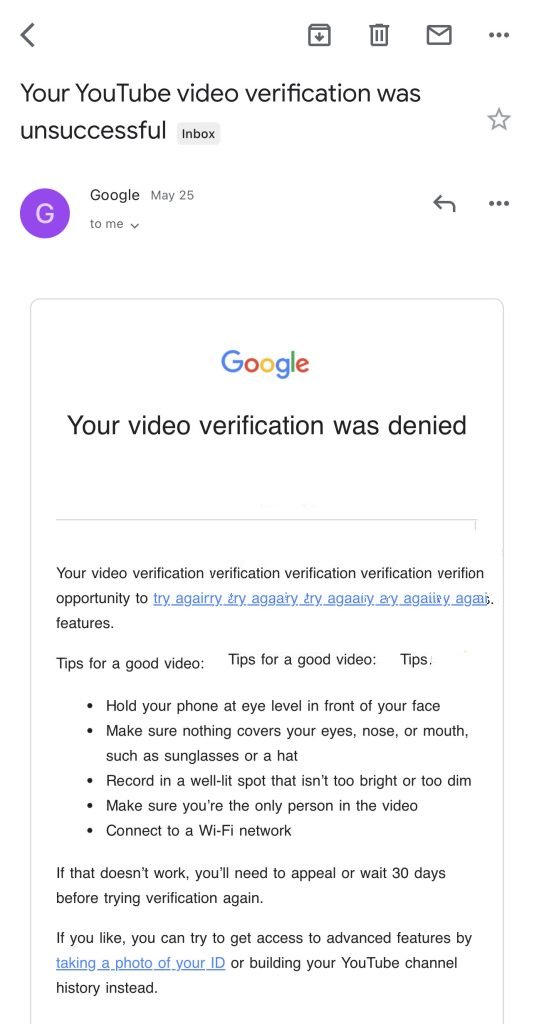
14• However, if you have not met the conditions mentioned in step 7! Google may reject your video, and you may receive the following email. So, once again, you will be allowed to go through the previous steps from the beginning. And if you fail again, you have to wait 30 days. So, strictly follow the conditions of sending the video mentioned in step 7.